Preparing to Use Search Analytics: BigQuery Connection Steps
Setup Steps
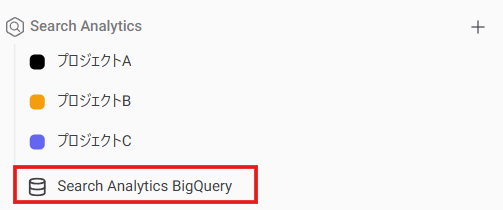
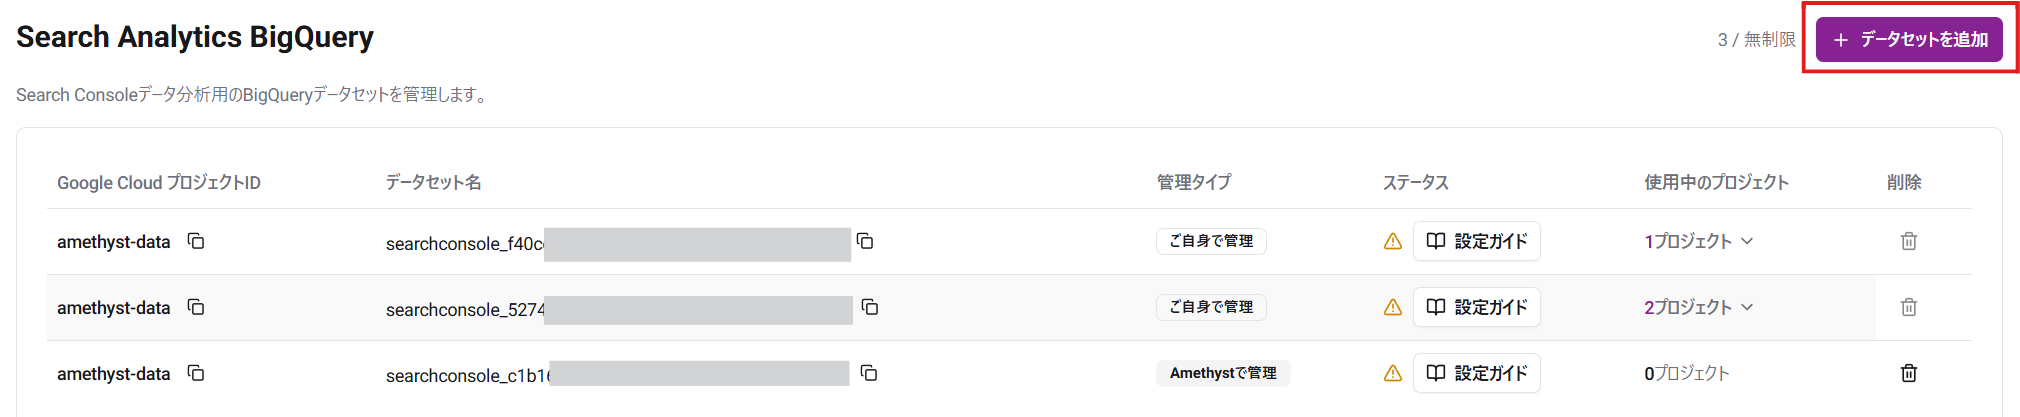
Section titled “Setup Steps”From the left menu, click “Search Analytics BigQuery” under Search Analytics. The dataset management screen opens. Click “Add dataset” in the upper-right corner.
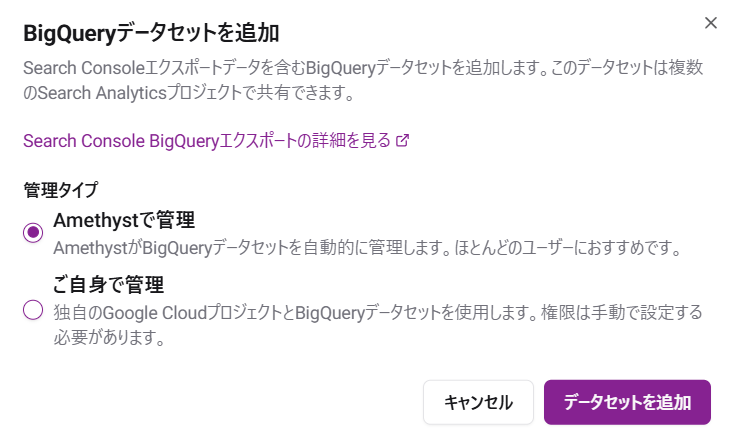
There are three ways to connect BigQuery. Choose one of the following methods.
✅ If you are not familiar with BigQuery, “Store data in Amethyst without preparing BigQuery” is the easiest option.
Store Data in Amethyst Without Preparing BigQuery
Section titled “Store Data in Amethyst Without Preparing BigQuery”📝 You do not need to configure or pay for your own Google Cloud project.
- You cannot use the Search Console export data directly outside Amethyst.
Select the management type “Managed by Amethyst” and add the dataset.
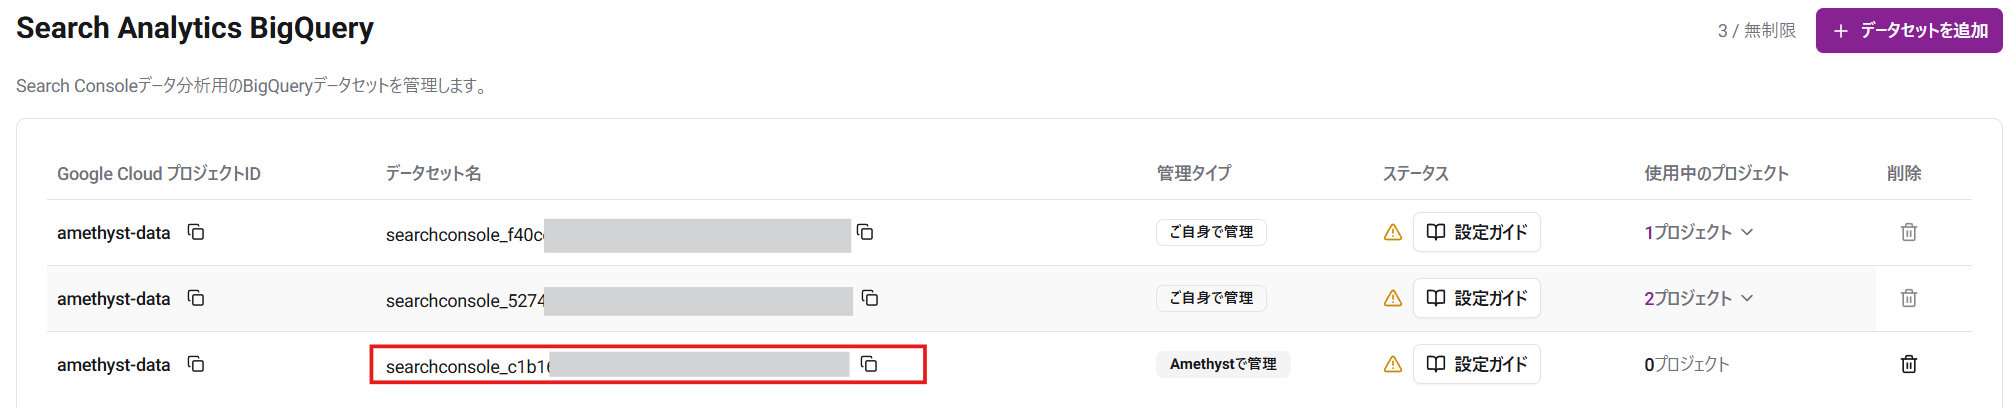
Confirm that a dataset with the management type “Managed by Amethyst” has been added, then copy the dataset name.
Next, configure bulk data export in Google Search Console.
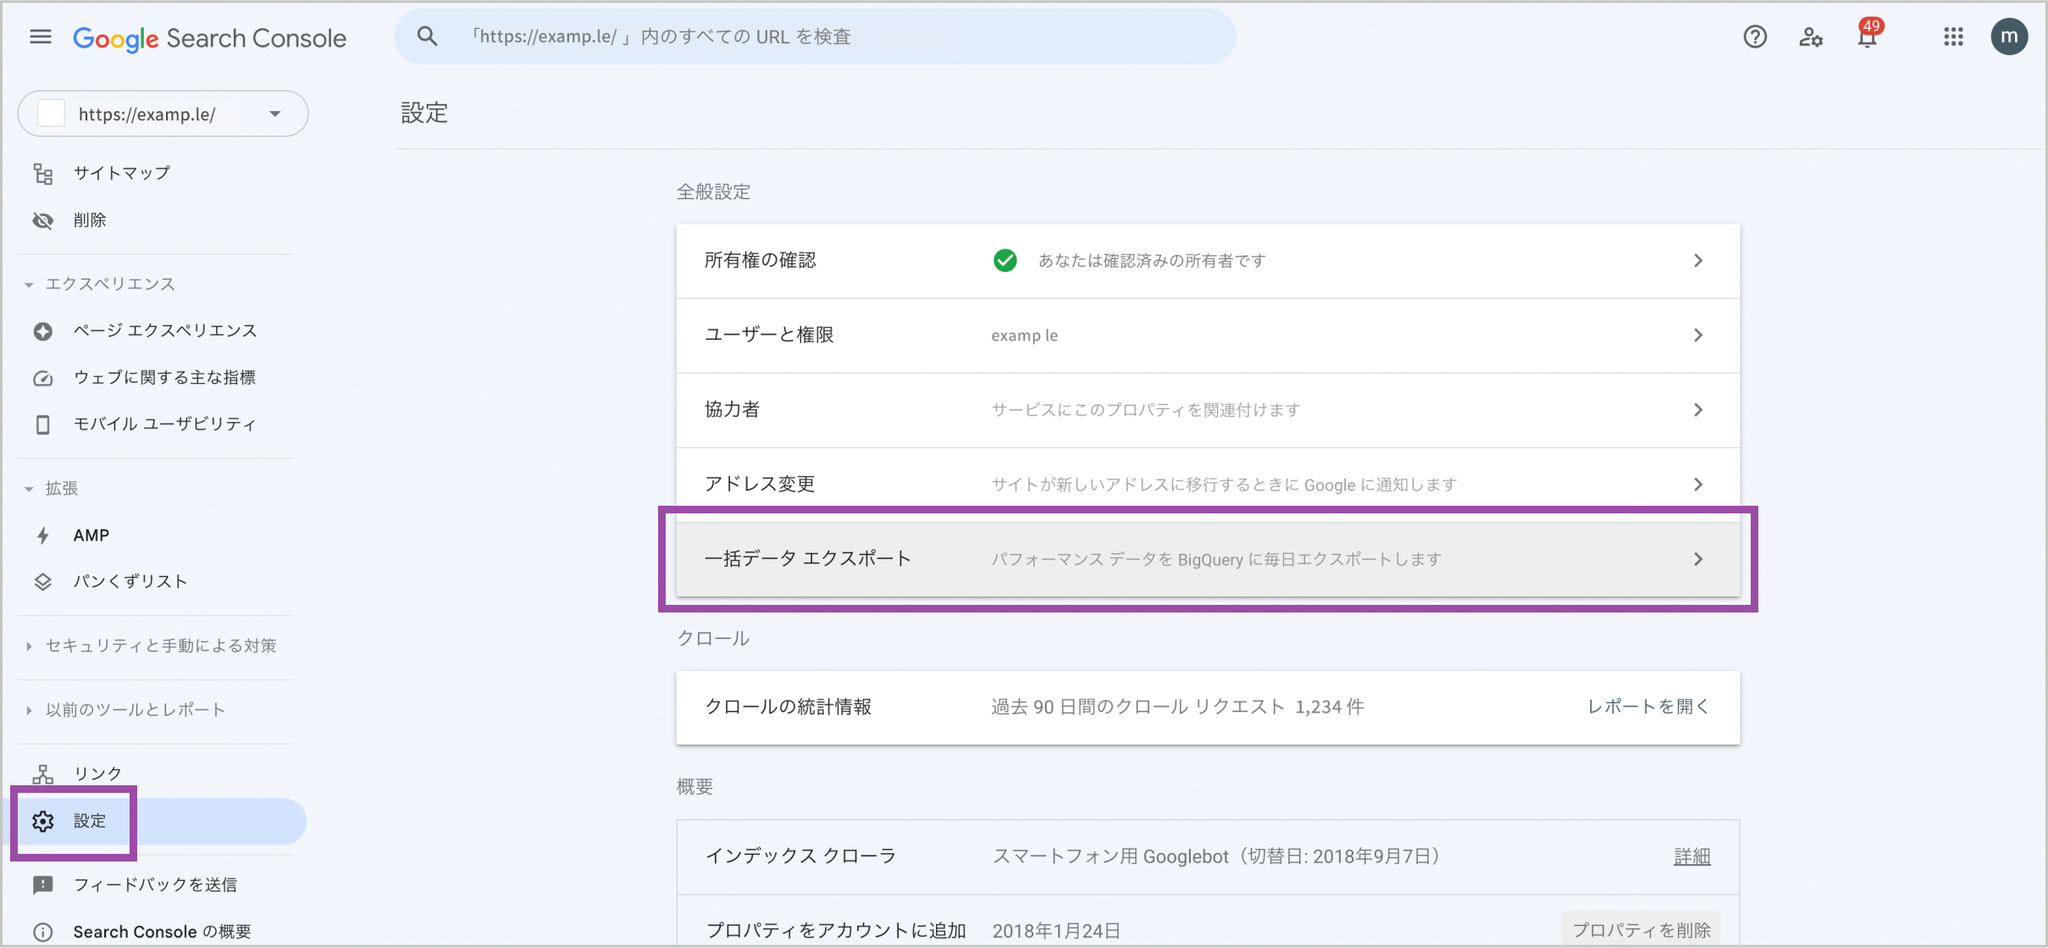
Go to Google Search Console, select “Settings” from the left menu of the Search Console property you want to analyze, then select “Bulk data export.”
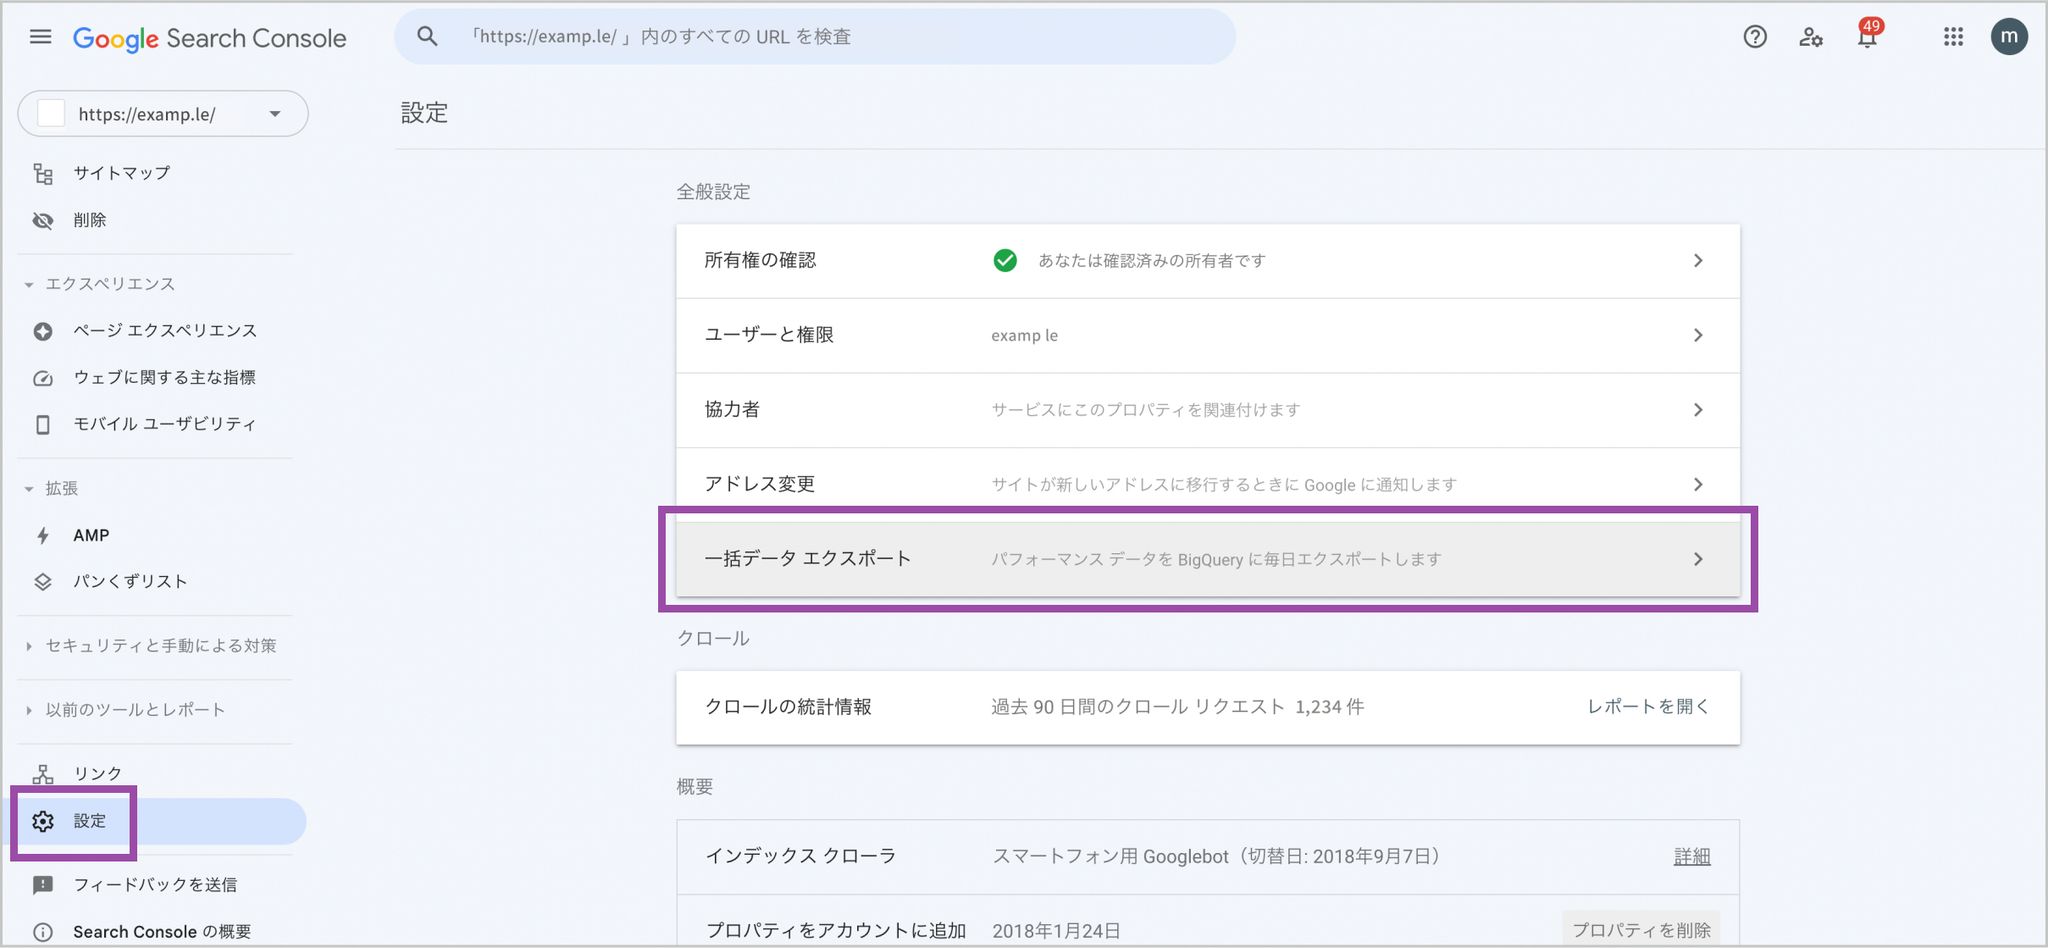
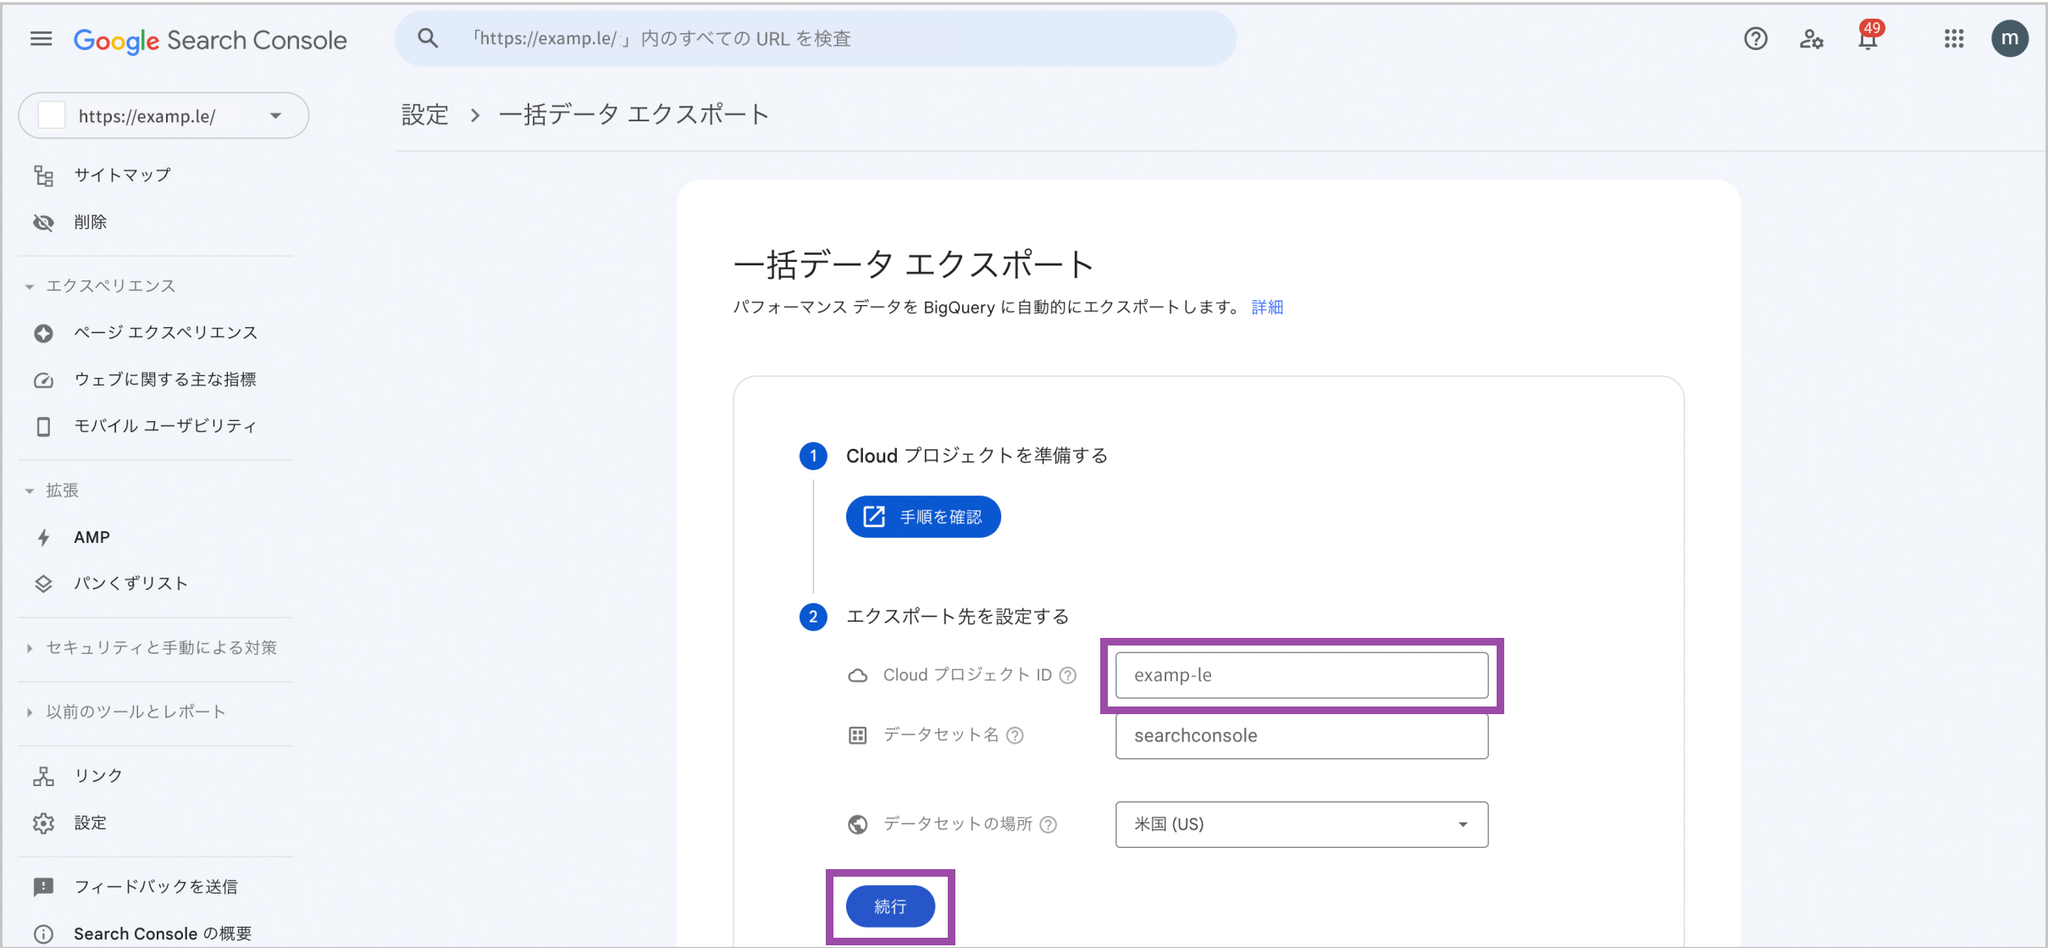
Enter the following information in the “Set export destination” section, then click “Continue.”
Cloud project ID: amethyst-data Dataset name: The string shown on the Amethyst screen that starts with
searchconsole_

Dataset location: United States (US)
When you click the create button, the data will be reflected within 48 hours (in practice, usually in about one hour), and Search Analytics will become available.
Export to Your Own BigQuery from Now On
Section titled “Export to Your Own BigQuery from Now On”📝 This option has many steps and is complex.
- You retain access to your own Search Console export data.
- You need to configure a Google Cloud project and BigQuery. Google may charge you depending on data size and other factors.
First, configure export to BigQuery. Follow the steps below to enable the BigQuery API, register the service account, configure data export, and grant permissions to Amethyst.
Enabling the BigQuery API
Section titled “Enabling the BigQuery API”-
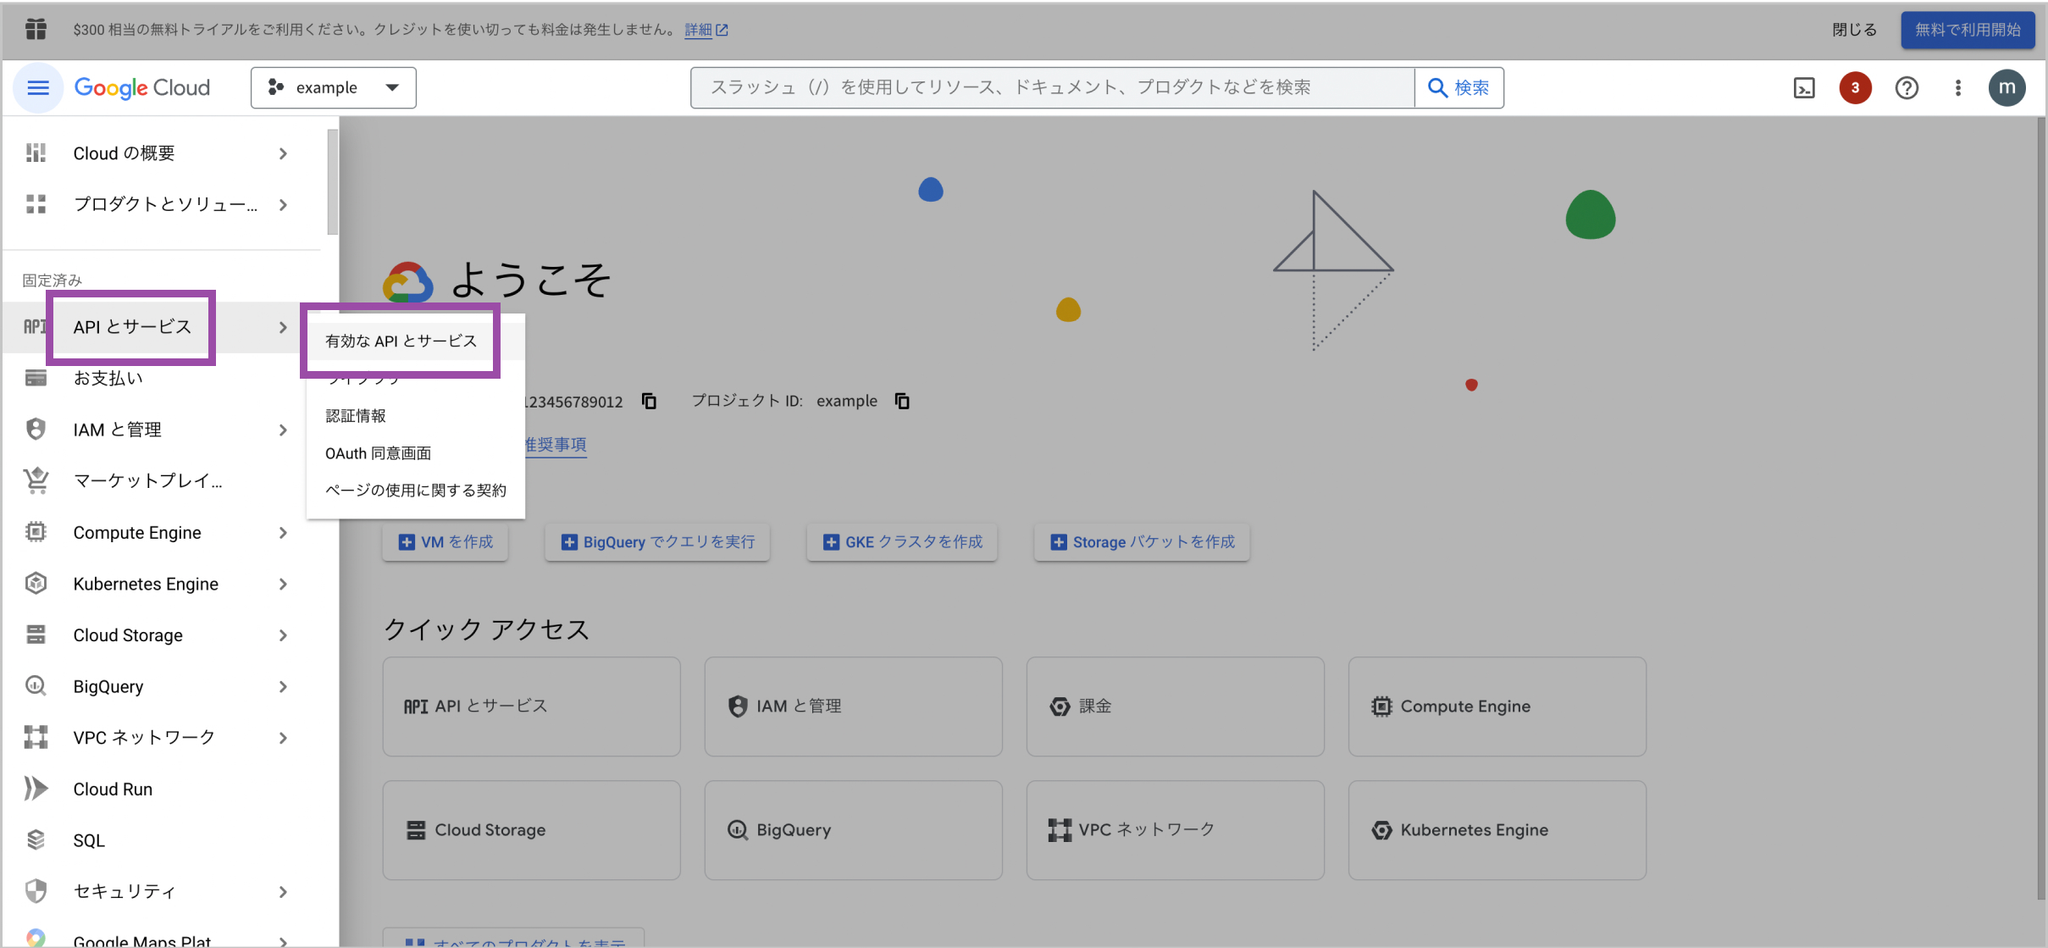
Open the Google Cloud Console.
-
From the menu, select “APIs & Services” > “Enabled APIs & services.”
📌 If you do not have a project, you cannot select this. Create a project first.
-
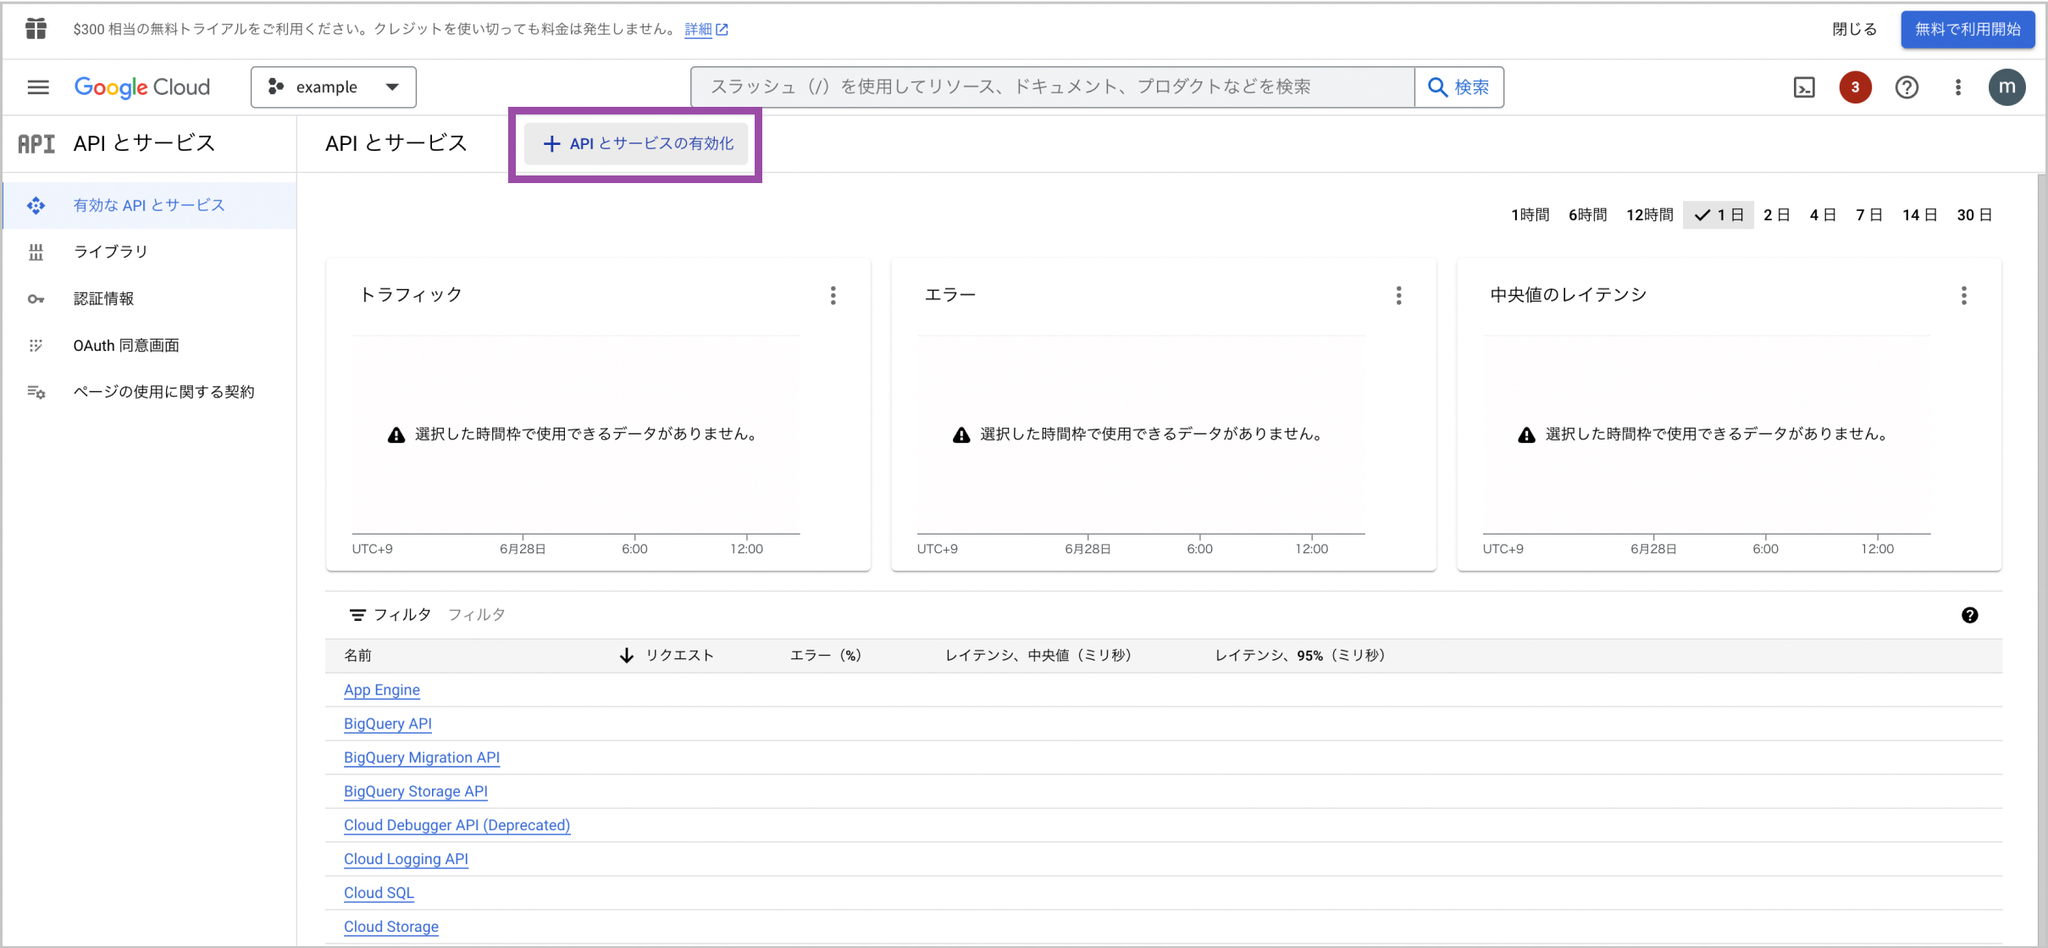
Select “Enable APIs and services.”
-
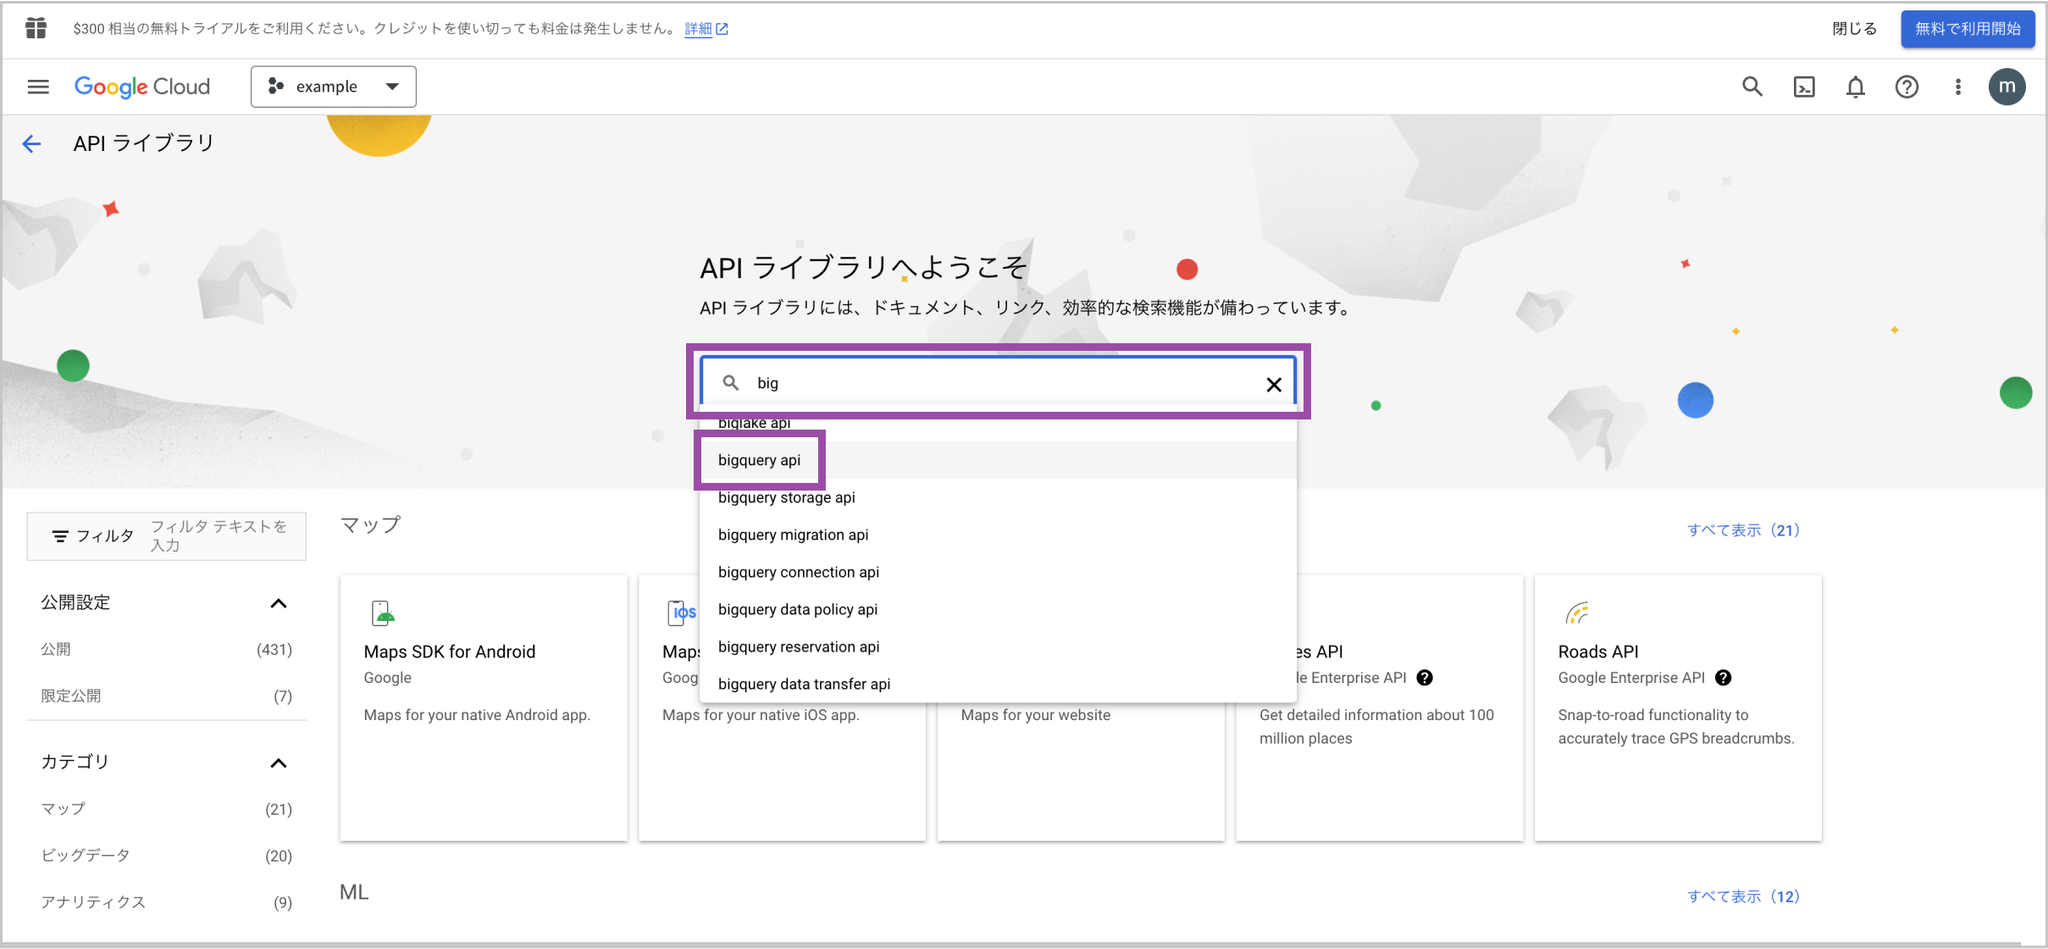
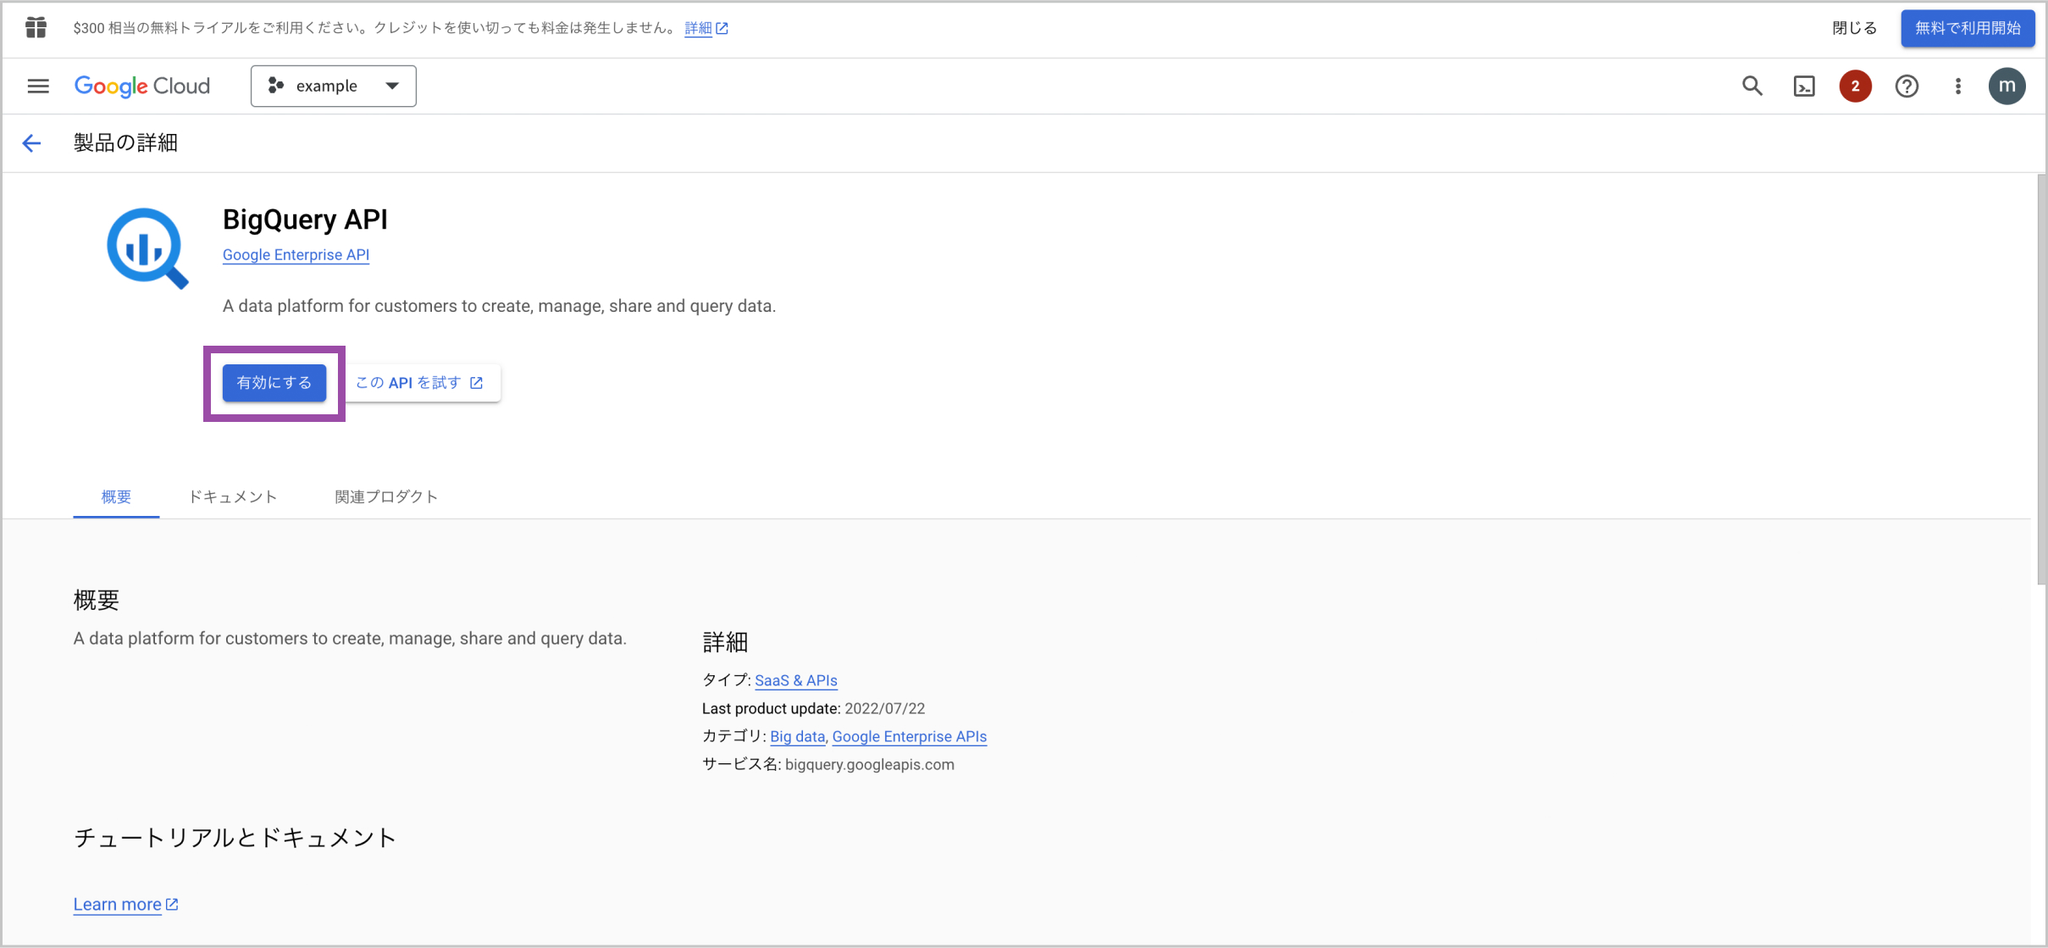
Enter “bigquery” in the search box, then select “bigquery api” from the options.
-
If it is disabled, select “Enable.”
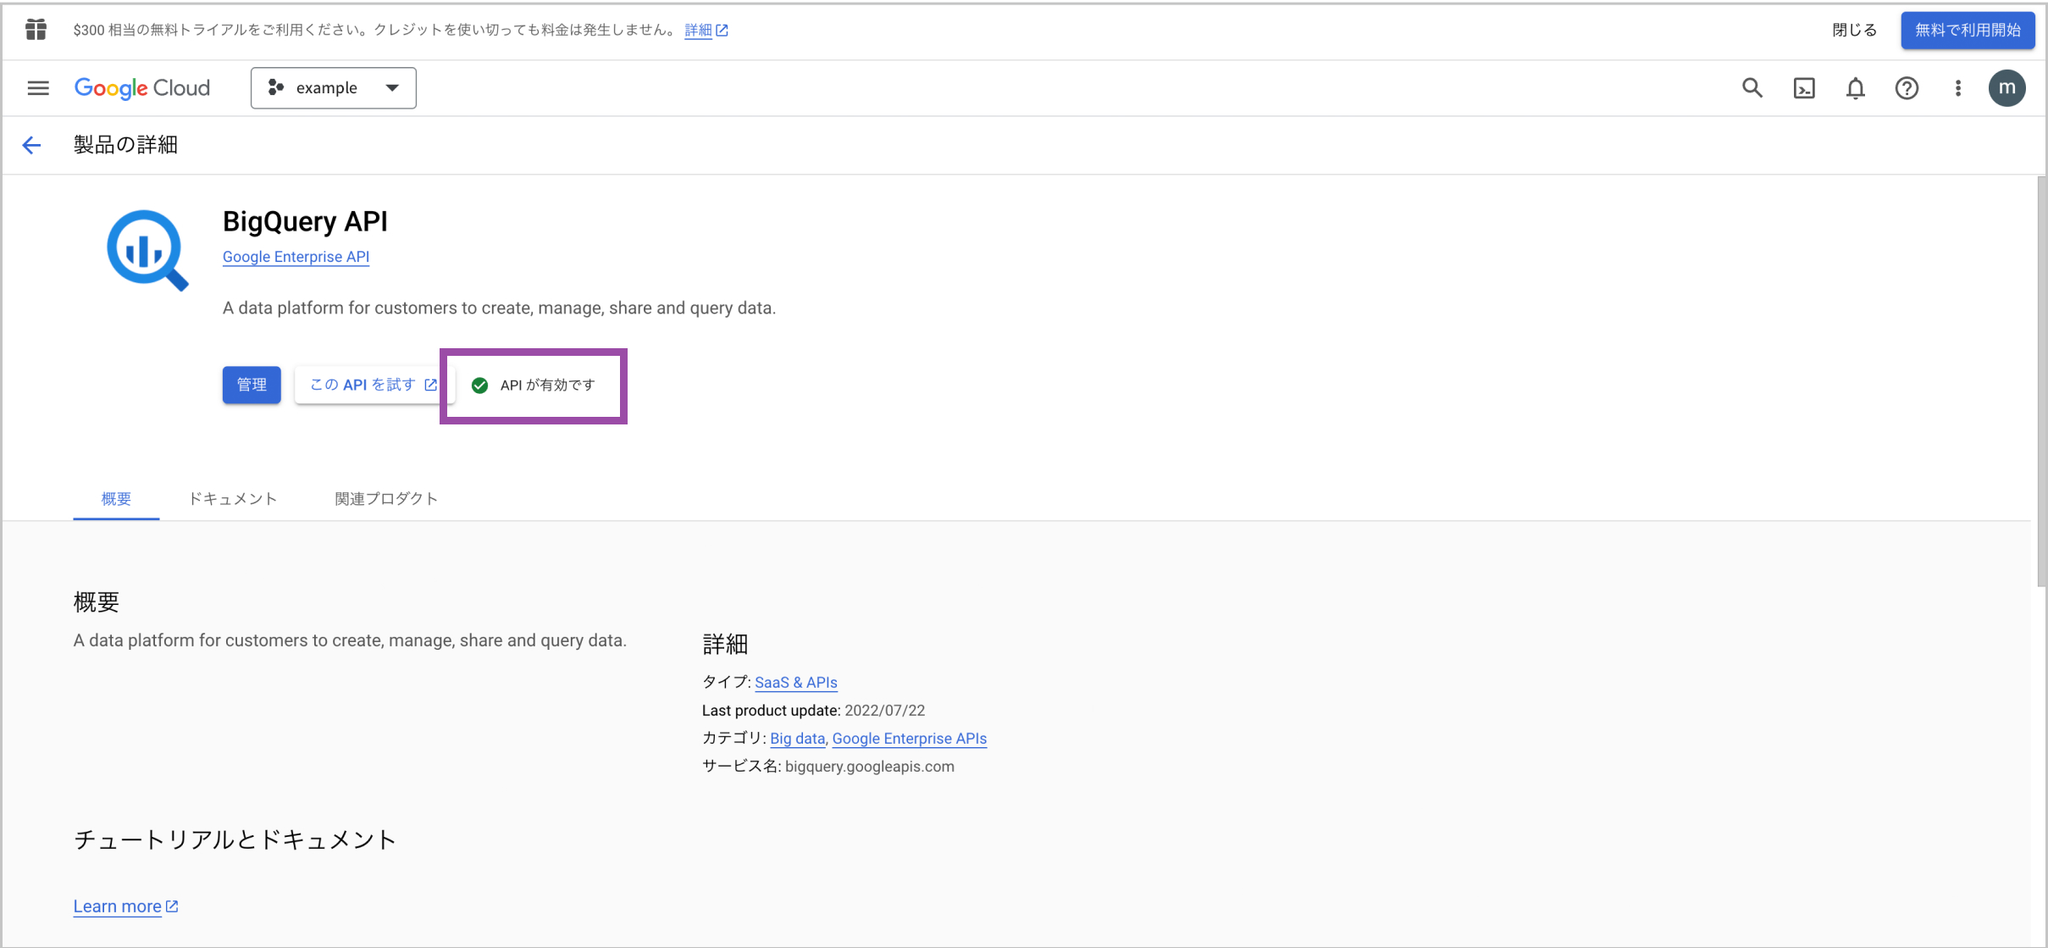
-
When “API is enabled” appears, BigQuery API enablement is complete.
Registering the Google Service Account in Google Cloud
Section titled “Registering the Google Service Account in Google Cloud”-
From the Google Cloud menu, select “IAM & Admin.”

-
Select “Grant access.”

-
Paste the following service account name into New principals.

-
Grant the two roles [BigQuery Job User] and [BigQuery Data Editor].
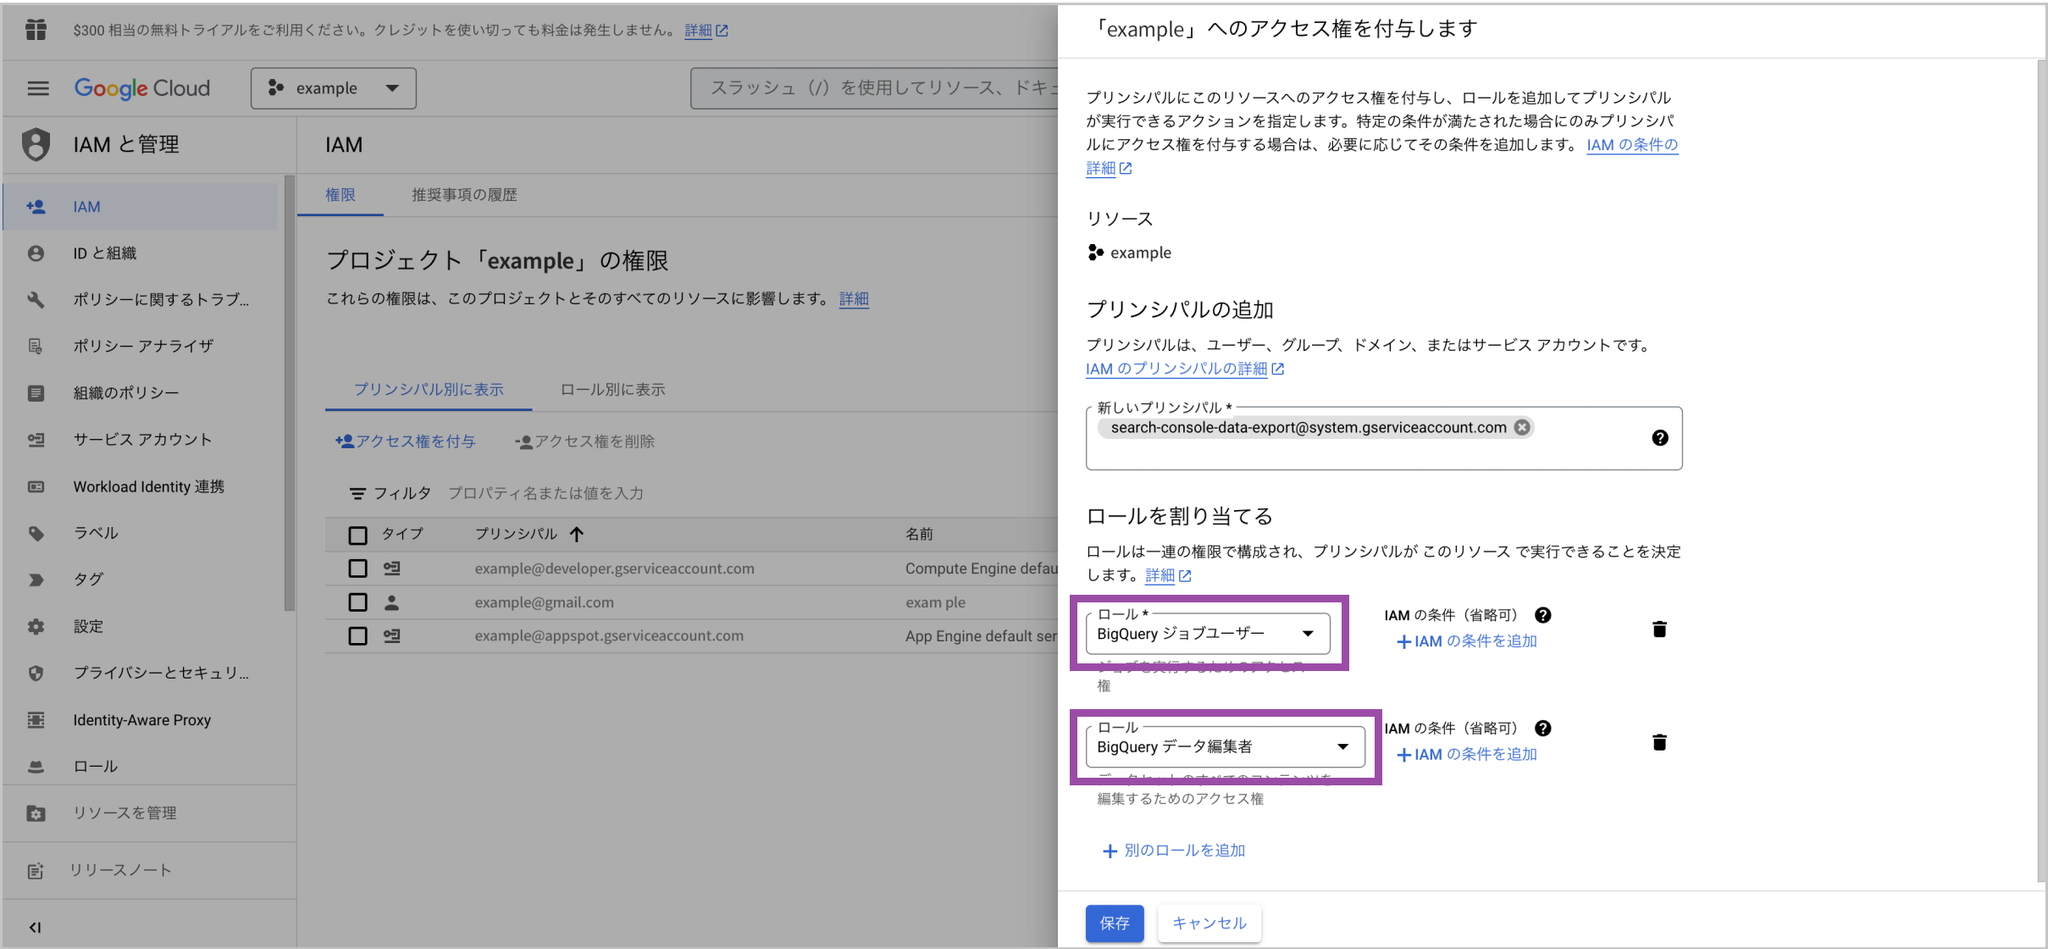
-
Click the “Save” button to complete adding the service account.
If policy update fails because of constraints/iam.allowedPolicyMemberDomains
Your organization is configured so that permissions can only be granted to Google accounts from allowed domains, such as your company domain.
Change the Google Cloud “Organization policies” setting with the steps below.
-
Log in to the Google Cloud console. https://console.cloud.google.com/
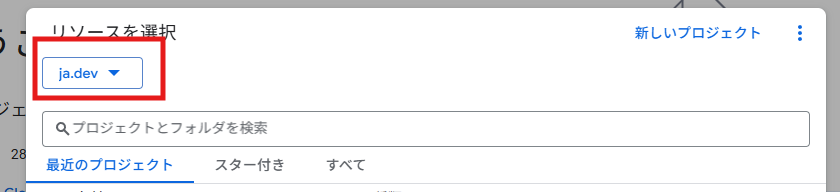
-
Select the organization. Click the project selector at the top of the screen, then select the target organization from the pull-down list. The organization item shows the domain name.
-
Open the Organization policies page. From the navigation menu (☰) in the upper-left corner, select “IAM & Admin” > “Organization policies.”
-
Search for the “Domain restricted sharing” policy. In the policy list, enter “iam.allowedPolicyMemberDomains” in the filter field.

-
Edit the policy. Click the policy that appears in the search results. When the detail screen opens, click “Edit policy.”
-
Add the allowed domain. Add the new domain with the steps below.
- Select “Customize.”
- Select “Merge” instead of “Replace” to merge the new policy with the existing policy. Be careful: choosing “Replace” removes the existing domains.
- Click “Add rule.”
- For “Policy value,” select “Allow.”
- For “Policy type,” select “Custom.”
- In the “Custom value” field, enter the domain to allow (
system.gserviceaccount.com), then click “Done.” - Finally, click “Save” at the bottom of the screen to apply the policy.
Configuring Search Console Bulk Data Export
Section titled “Configuring Search Console Bulk Data Export”-
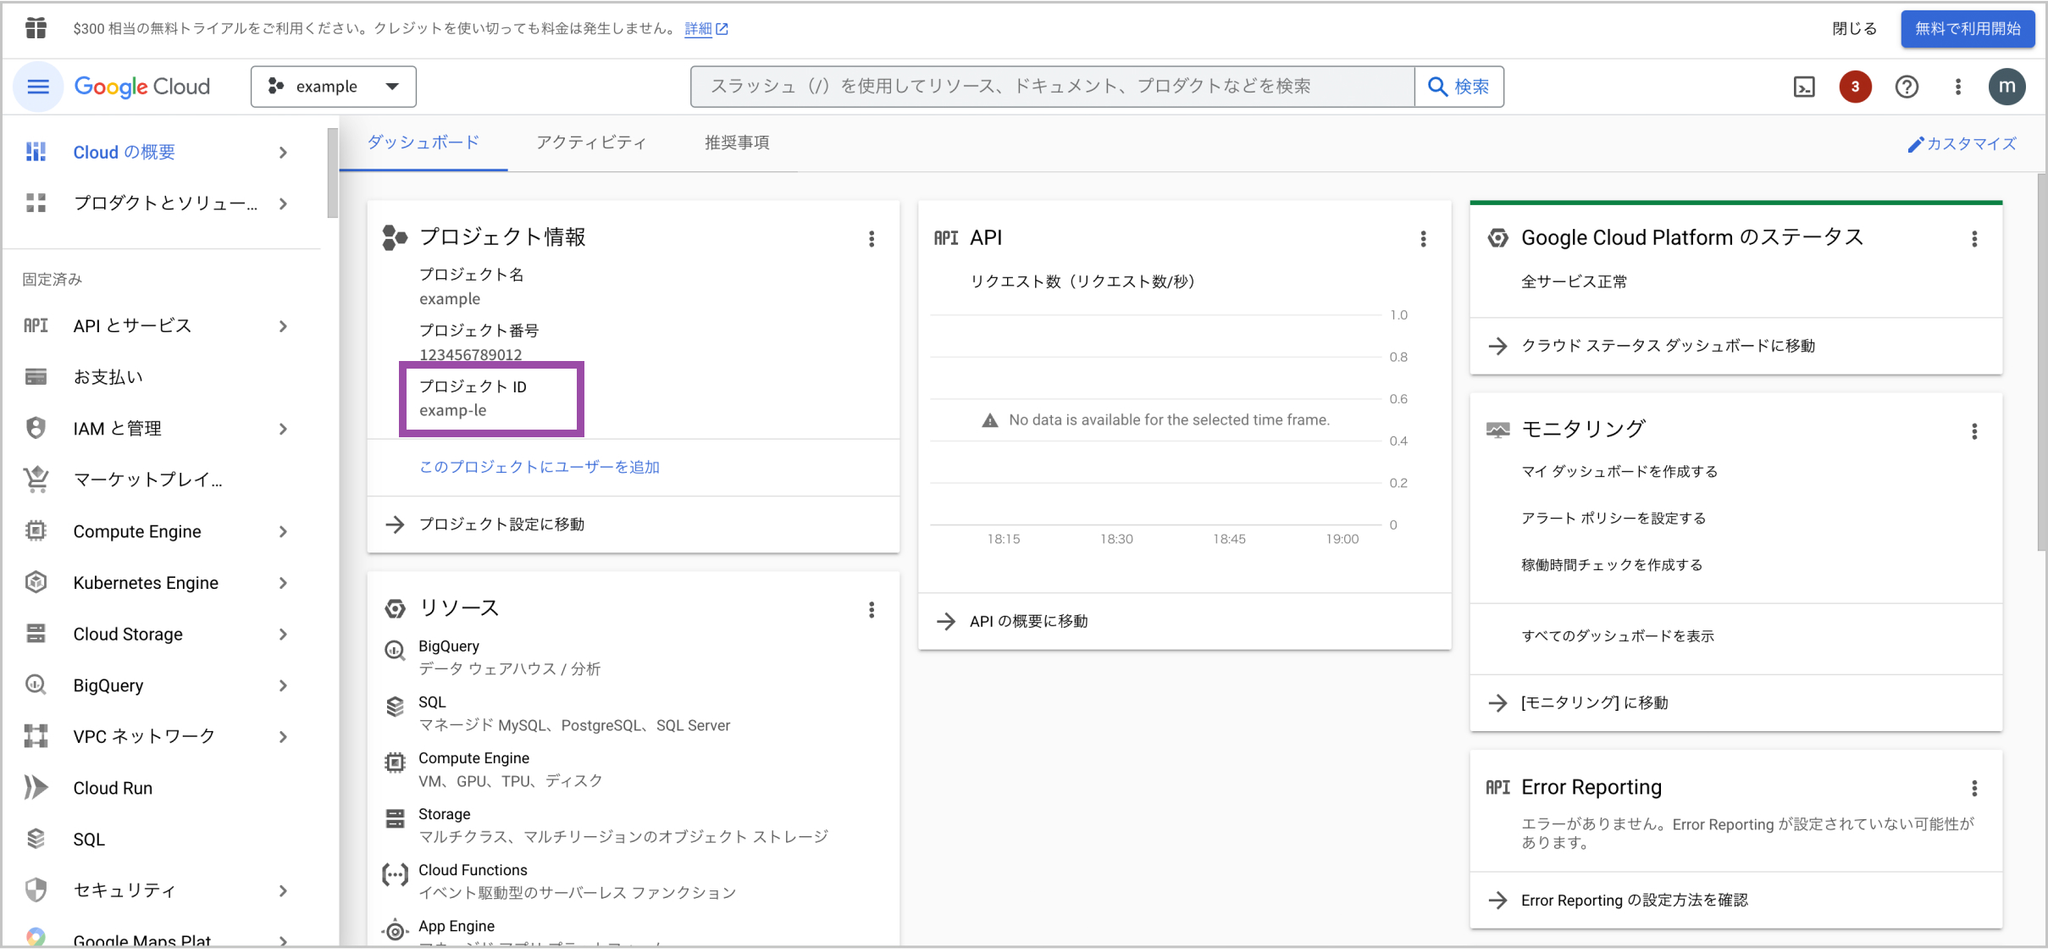
To check the Cloud project ID, select “Cloud overview” > “Dashboard” from the Google Cloud menu.

-
Check “Project info” > “Project ID.”
-
In Google Search Console, select “Settings” from the left menu of the project you want to analyze, then select “Bulk data export.”
-
On the “Bulk data export” page, enter the Cloud project ID you checked in steps 1 and 2. You do not need to change “Dataset name” or “Dataset location.” Click Continue to complete bulk data export setup.
Granting Permissions to the Amethyst Service Account
Section titled “Granting Permissions to the Amethyst Service Account”-
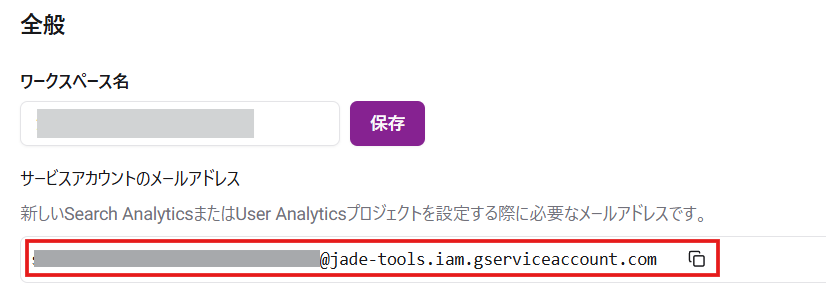
Click “Workspace settings” in the lower-left corner of the Amethyst screen.

-
Copy the service account email address.
-
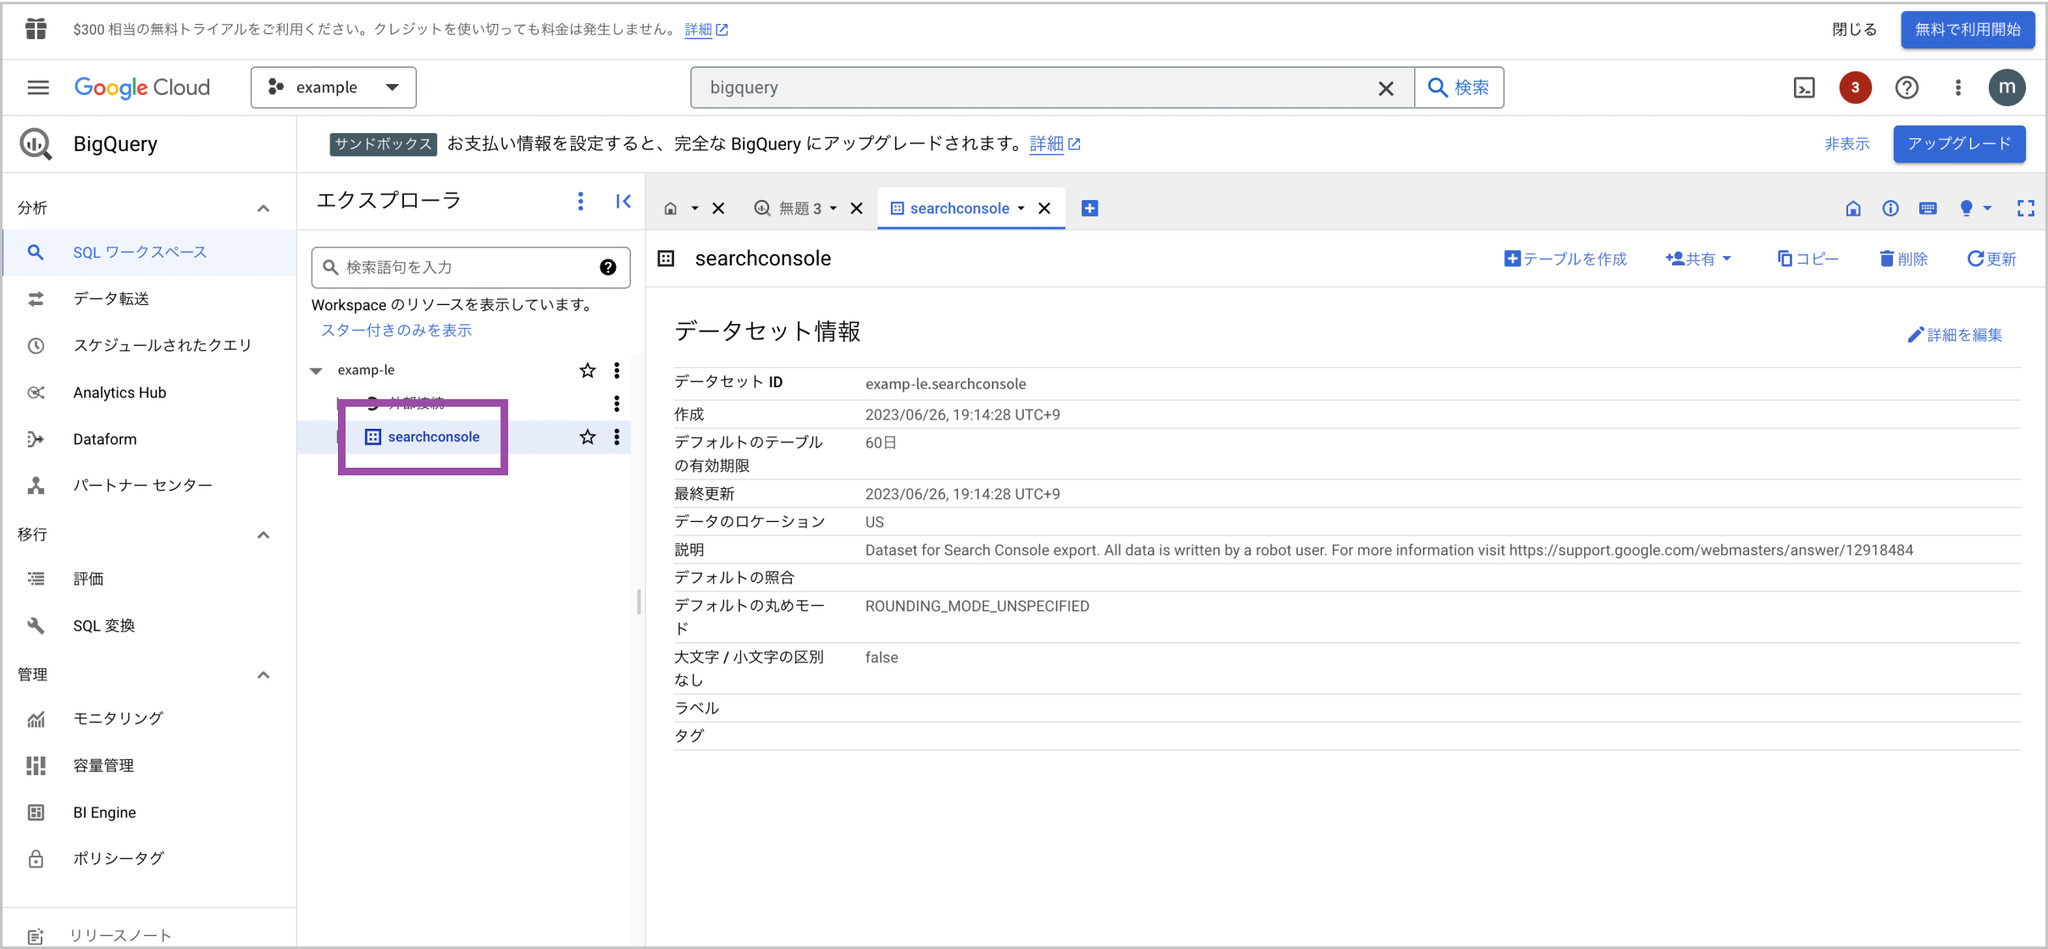
Go to BigQuery and click the “searchconsole” dataset in the “Explorer” panel.
-
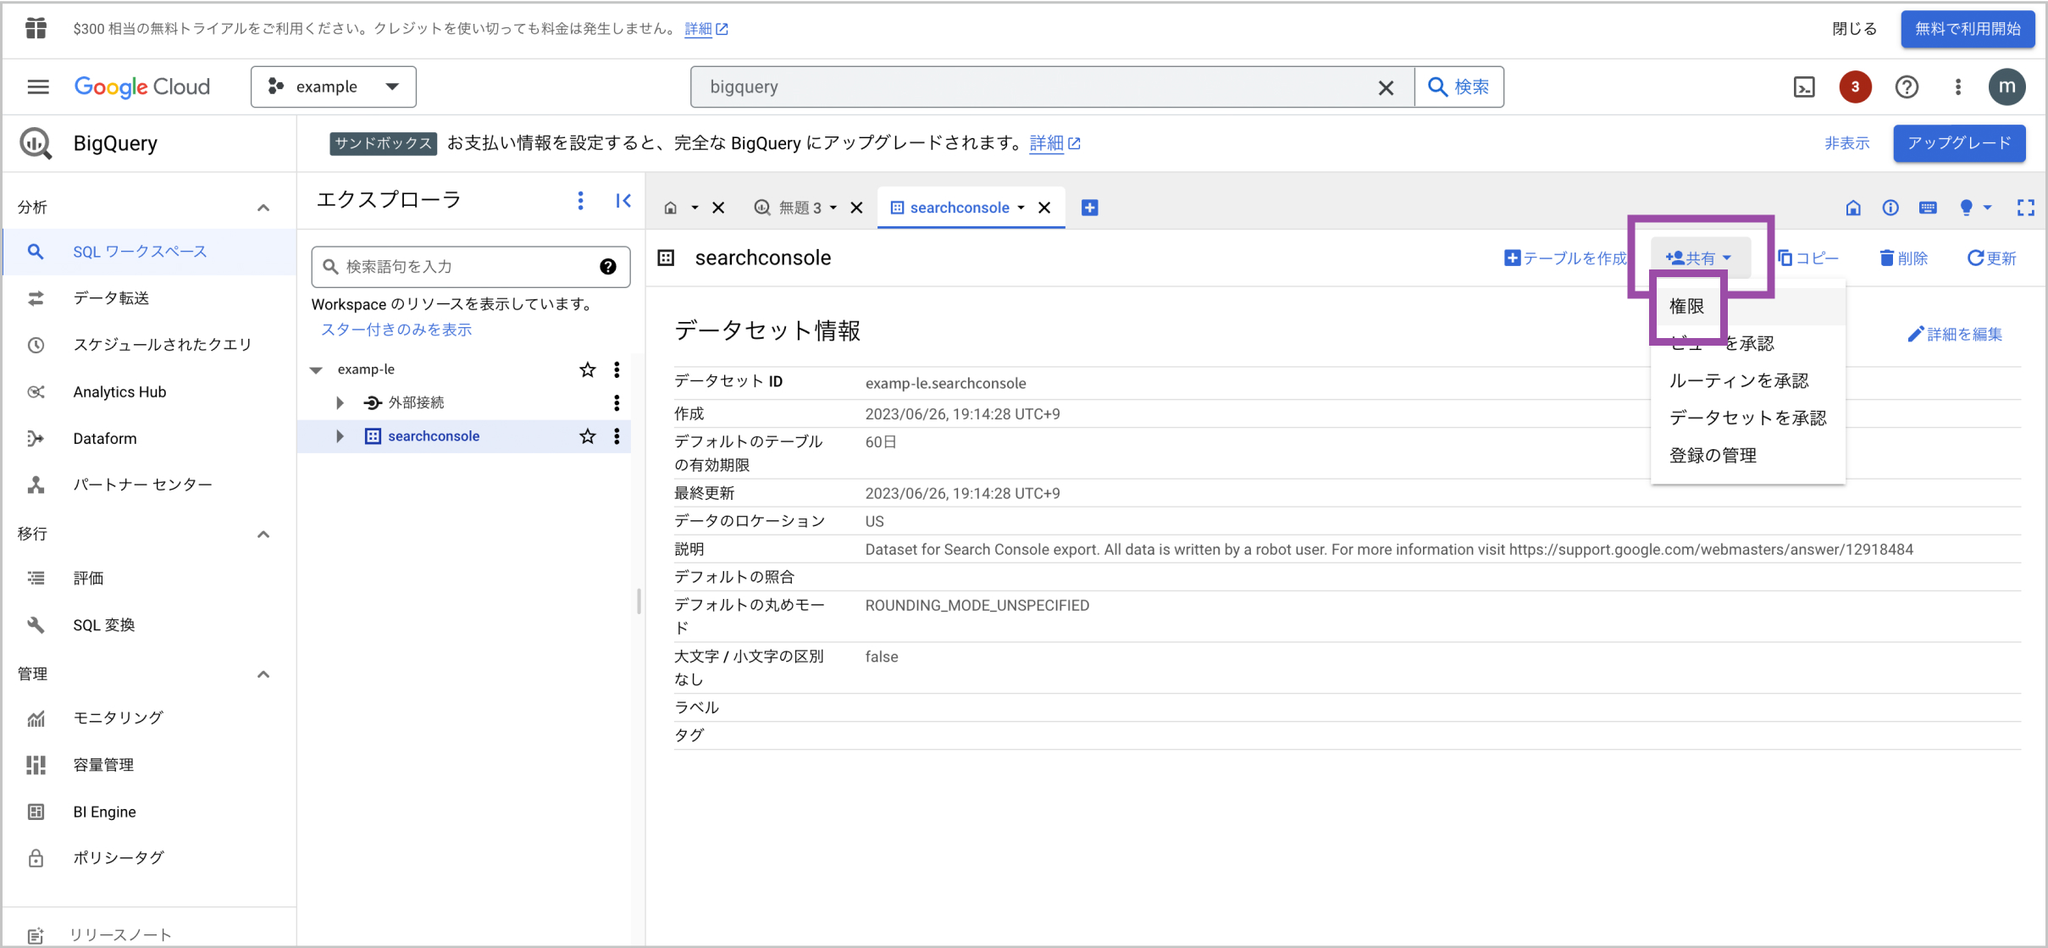
Click “Sharing” > “Permissions.”
-
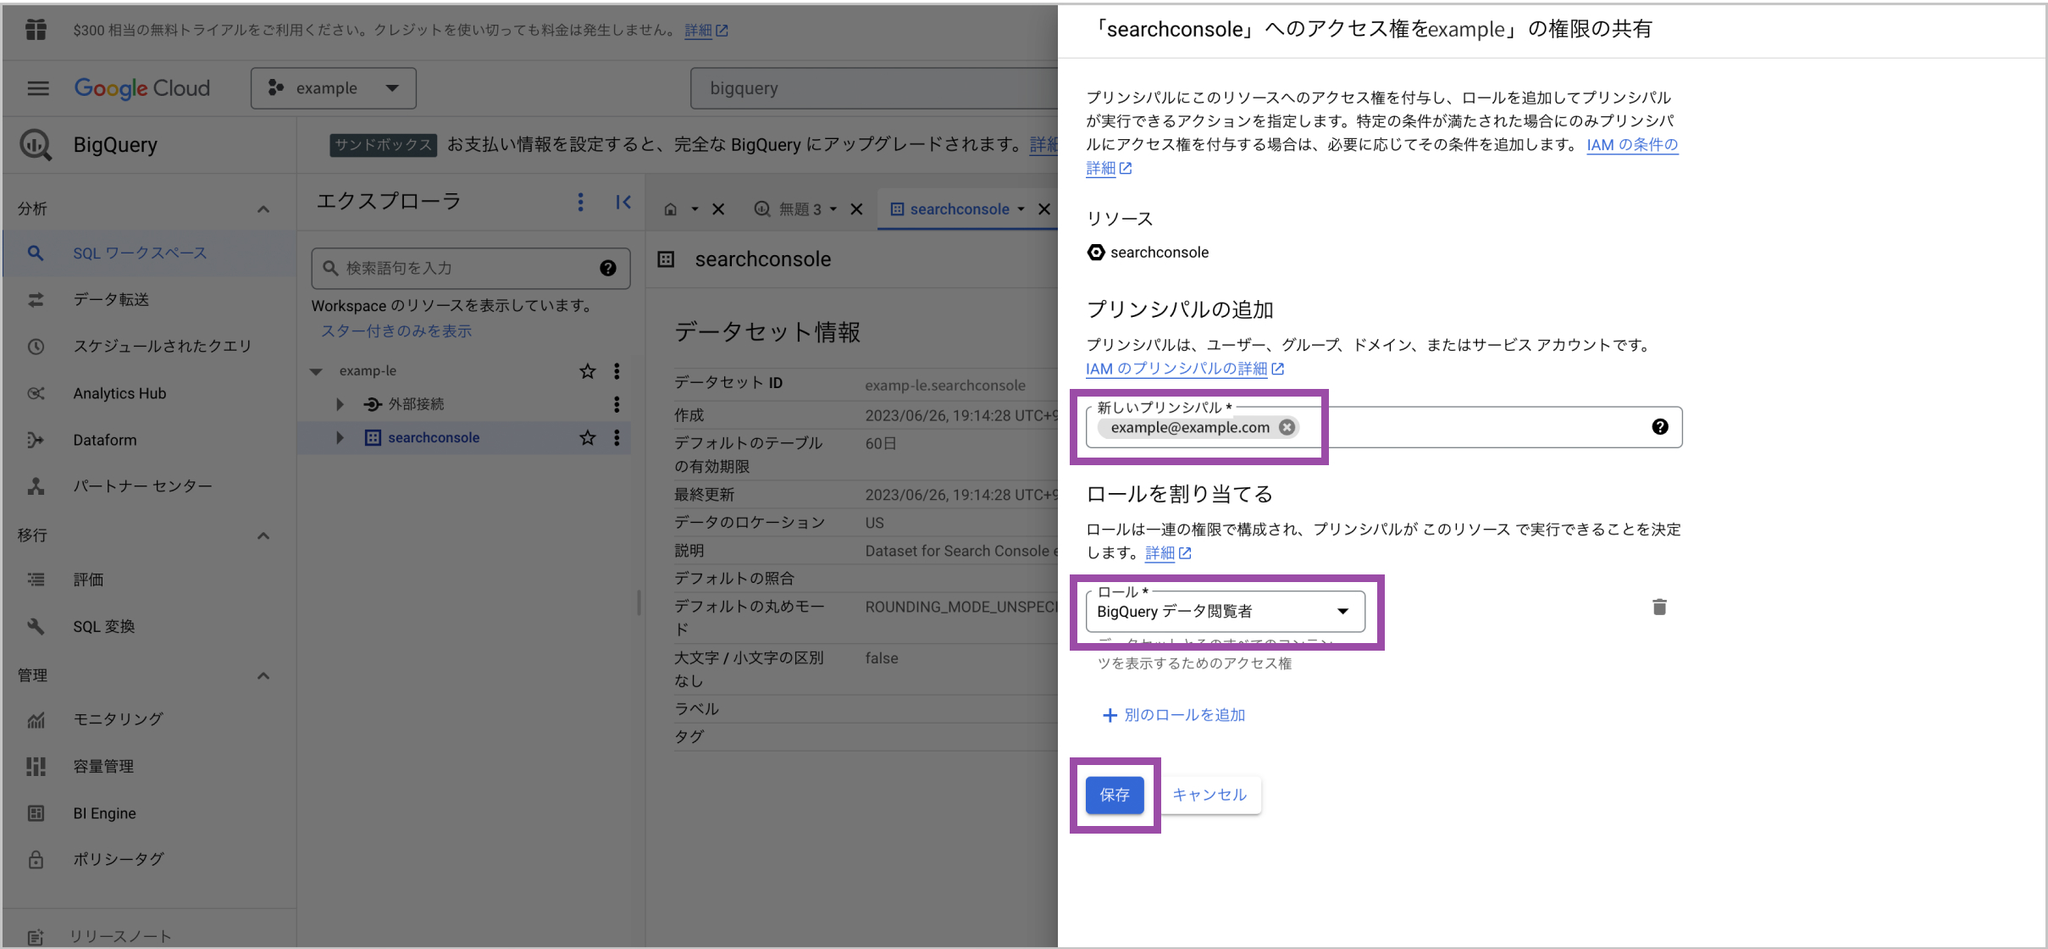
Click “Add principal.”

-
Enter the copied service account email address in “New principals,” set the role to “BigQuery Data Viewer,” and click “Save” to finish.

Registering the Project ID and Dataset Name
Section titled “Registering the Project ID and Dataset Name”-
Go to BigQuery and check the Google Cloud project ID and dataset name from “Explorer.”
-
From here, work in Amethyst. Click “Search Analytics BigQuery” and add a dataset.
-
Register the Google Cloud project ID and dataset name you checked.
-
When you click the Add dataset button, the data will be reflected within 48 hours (in practice, usually in about one hour), and Search Analytics will become available.
If You Already Have Your Own BigQuery and Want to Grant Amethyst View Access
Section titled “If You Already Have Your Own BigQuery and Want to Grant Amethyst View Access”📝 You retain access to your own Search Console export data.
- You need to configure a Google Cloud project and BigQuery. Google may charge you depending on data size and other factors.
-
Click “Workspace settings” in the lower-left corner of the Amethyst screen.
-
Copy the service account email address.
-
From here, work in BigQuery. Grant permissions to the Amethyst service account. Go to BigQuery and click the “searchconsole” dataset in the “Explorer” panel.
-
Click “Sharing” > “Permissions.”
-
Click “Add principal.”
-
Enter the copied “service account email address” in “New principals,” set the role to “BigQuery Data Viewer,” and click “Save” to finish.
-
Go to BigQuery and copy the Google Cloud project ID and dataset name from “Explorer.”
-
From here, work in Amethyst. Click “Search Analytics BigQuery” and add a dataset.
-
Register the copied Google Cloud project ID and dataset name.
-
When you click the Add dataset button, the data will be reflected within 48 hours (in practice, usually in about one hour), and Search Analytics will become available.